
So you want to set up a photography studio?
You’ll be glad to know that it isn’t too difficult to get started. Even the simplest photo studio setup can give you many great benefits.
For those beginners out there, a studio allows the photographer more control over different factors that affect an image. Having full control over the light is an essential step to taking professional shots.
Setting up a photography studio will require some investment in terms of time and money. Here are a few questions you should be asking, to help create the ideal studio.

What Am I Photographing?
Your first consideration should of course be what you are going to photograph. Are you focusing on objects or people? You need to apply a different set of styles and skills to get great looking shots. From portraits and fashion, to food and product photography, various types of photography will need different approaches.
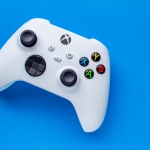
In product photography you are typically working on a smaller scale, where attention to details will make or break the shot. Cleaning tool like disposable cloth and paintbrushes will come in handy for those last minute touches.
Balanced lighting is important when shooting products, and even more so for jewellery photography. The reflective nature of the subject poses a challenge. You can solve this issue by equipping your studio with different types of light sources to give further control on the distance, intensity and angle of the lighting.
Portrait photography gives you a different set of challenges. More space and equipment is required to accommodate larger scenes and backdrops. Of course whenever people are involved, getting the studio setup correctly is half the battle. You also need to be able to take control and direct everyone in a way to get the best from them. Create the right studio atmosphere for the best results.
Always take into consideration the amount of studio space, types of equipment and techniques required for the kind of photography you wish to experiment with.
How Do I Pick the Ideal Studio Space?
Setting up a dedicated space to work in is the best way to hone your skills. If you have a sizable budget to work with, and have aspirations to become a professional photographer, you could rent a suitable place for the studio. However, a studio really doesn’t have to be an overly elaborate and spacious setting.
Even a reasonably sized room will work well. A home photography studio is sufficient for many and can produce shots just as professional. You could start off small by just finding a usable corner in your home to set up the studio. As your photography skills improve, you can expand into an entire room if possible. A spare bedroom or basement will work well.
What Equipment Do I Need?
For your first studio setup you can start with a few basic and affordable tools. At a minimum get two light sources, a diffuser and a white backdrop. Over time you can buy bigger and more specialised equipment to match your needs.
Lights
A photoflood with a reflector and stand is the least expensive light available. Though many people do find the heat and glare uncomfortable. A good solution is to invest in high powered studio flash. This will cost you more, but will get you professional results.
Diffusers
Reflectors are the standard tool used for redirecting and diffusing light. Use different attachments to further alter the light. The large umbrella style reflectors bounce diffused light onto the subject which gives a softer light.
A softbox allows you to obtain an even softer light. These boxes can fit over the flash head to produce a smooth and even glow. In portrait photography using a beauty dish can create a dramatic effect, where the light is somewhere between a softbox and direct flash.
For small product shots, you can often place the subject inside a light tent, instead of putting a softbox on the flash. This is a great tool for catalogue and food photography.
Backdrop
Backdrops should be chosen carefully based on the type of subject. The most common colour is plain white, but you can use a variety of colours and even textures to get the desired look and feel.
Camera
With a DSLR camera you can future proof your investment and easily grow as a photographer. I know choosing a camera can be really tough. A beginner can’t go wrong with one of the more popular brands such as Canon or Nikon. Either one is a great choice as you get a wide selection of lenses and accessories to further improve and specialise in different types of photography.
Tripod
Sometimes you will want the flexibility of holding the camera yourself and trying out different shots. Other times a tripod will certainly come in handy to get perfectly still shots. A tripod is particularly useful when adjusting different elements in the photo. Take the exact same photo and easily compare the changes you make to find the best solution.
Post Production
Your work isn’t done even after you have taken your photos. Most images will need at least some editing on a computer. For many professionals the preferred equipment of choice for photo editing and other graphical work is an iMac, but any PC with sufficient RAM and GPU will get the job done.
This post was brought to you by Digital Exposure an advertising photography studio based in Chester, UK.


Leave a Reply