
PDF is currently one of the most popular file formats used for documents on the internet. This is because the PDF file format is developed to allow anyone with an operating system to open-up and read documents with ease. However, there is a big drawback with this file format because it’s normally not editable and it is not possible to insert images on a Mac computer. Thankfully this has changed as a PDF editor is introduced for Mac. This is the iSkysoft PDF Editor for Mac and it has features that will make it easy for you to edit text, insert images, mark-up PDF files and more. Continue reading to find out how to edit PDF images on Mac with this program.
Even though the PDF files are used widely, both by companies and individuals across the world, persons usually have headaches when they try to edit those documents. This is especially true when it comes to making changes to images in PDF files. If you are reading this, you might have just encountered this problem because you receive large PDF files with images or pictures that you would like to edit on your Mac. It could be that you were told to convert or extract image from PDF to another format such as PNG or JPG and then change back the file to PDF once you make the necessary changes.
Considering that this large project would take some time, you might be looking for an easy way to make the changes. So, this is where the iSkysoft PDF Editor for Mac will come in really handy. This professional editor will help you to edit PDF pictures Mac within seconds. Follow the steps below to get started.
Start by downloading and installing the iSkysoft PDF Editor to your Mac. Once you download the editing program, you can run it to load your PDF file.
Open up the PDF file in the Editor program to the add images that you want. Drag the desired PDF file with the image onto the program’s interface for editing.

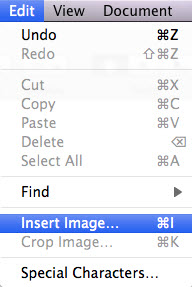
Begin the editing process after you insert image into PDF file on your Mac. Look at the top section of the tool bar to find the editing tools. You will find the tool to insert image on the editing tab.
At this point, you are free to insert the images directly from your computer into the PDF document. Now, the fun part will start as you are getting to edit as you want. You are able to edit, resize and remove the images, in addition to making changes to the PDF document.
After you learnhow to edit PDF images on Mac with this Editor tool, you will always have completelyeditable PDF files.
About the author:-
Tom Brown is a specialist technical content writer. He writes many articles for online users. Follow him on Google+


Leave a Reply