
As Windows users, you must be very familiar with Windows Media Player (WMP). Developed by Microsoft, it is a media player and media library application used for playing video/audio/images on PC and Windows mobile-based devices. Windows Media Player 12 is the most recent version of it. Most Windows users may know it and use it. But not many know it well and make good use of it. Here we are going to give you some tips to help you better organize and enjoy your digital media collection with Windows Media Player 12.
1. How to Change Basic Settings in the Windows Media Player 12
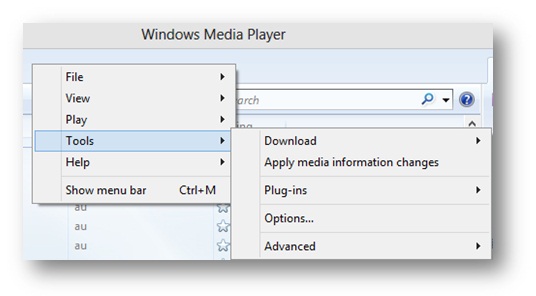
If you’ve used the older version of WMP, you may have the feeling that the options of version 12 have been uneasy to find so that it may take a while for you to get the way to change the basic settings. Well, to do this, you just need to simply right click the menu bar, and then go to Tools list to click the Options. And then you can find almost any setting option including Download, Apply media information changes, Plug-ins, Options, Advanced.
2. How to Play Videos and DVDs in WMP 12
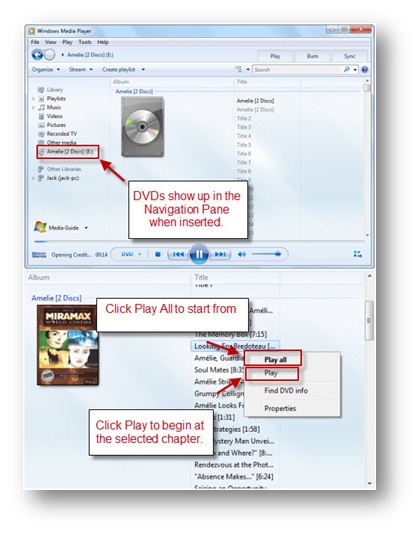
To play videos on WMP 12, it is so easy. Click the Videos in the Navigation Pane on the left. And then the videos will show on the Player Library. Double click it and then it will be played. Or you can select it and then click Play on the Playback Controls to play it. If you want to play DVDs, just insert the DVD disc to your computer. After your computer recognizes it, click the DVD icon in the Navigation Pane. And then you can view all of the chapters and titles. At this moment, you can right click any chapter to choose to play all or to play a selected one.
Note: If you want to play Flash SWF files on the WMP 12, we recommend you to convert SWF to WMV or other WMV supported formats like AVI, MPEG-1, and MPEG-2 etc using iOrgSoft SWF Video Converter (or iOrgSoft SWF Converter Mac).
3. How to Rip Music from and Copy Music to CDs in WMP 12
WMP is given the ability to rip audio from and copy music to compact discs.
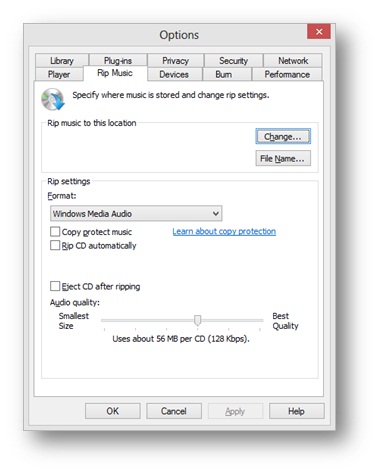
To rip music from a CD, you need to insert an audio CD to your computer first. After the computer recognizes the disc please click on the CD icon in the Navigation Pane on the left. And then you may have the need to change the rip settings. To do this, please hit the “Rip settings>More options” to enter the Options window. You can change file name, Kbps rate, and file format there.
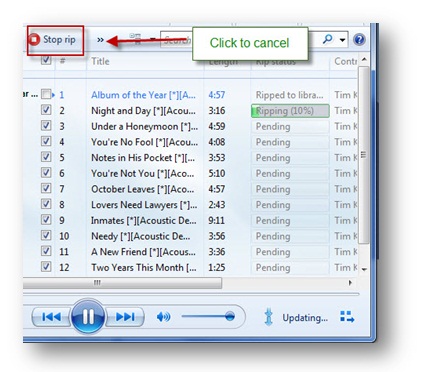
After finishing set the Rip settings, you can choose songs that you want to rip. After that, you can go to click Rip CD. You will find when the ripping starts, the Rip CD changes to Stop rip. You can stop ripping anytime you want. When finished, the music will be automatically added to your Player library.
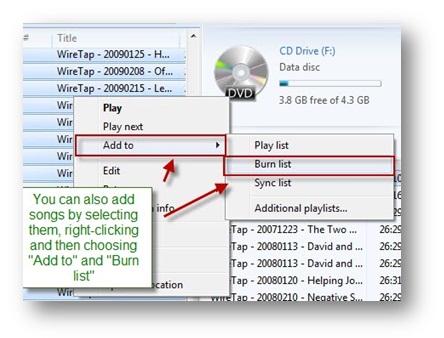
As we said before, it is not only able to rip music from CDs, but also copy music to CD. To burn a music CD, you need to insert a blank CD into your disc drive. The Burn List will appear automatically then. You then need to add songs to your Burn List by dragging and dropping the album directly. In addition, you can also choose each track individually and drag it to add to the Burn List. Or you can also simply right click a song or a group of songs and click Add to>Burn List to add songs to Burn List.
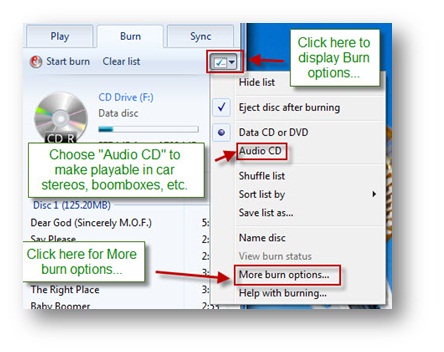
After that, you need to choose a Disc Type. There are three various types of discs for your options-Audio CD, Data CD, and Data DVD. Click the Burn Options icon in the upper right hand corner to choose the type of disc to burn. If you want to play the CD in car stereos, boomboxes etc, you should choose Audio CD as the right type. Moreover, to click More burn options in the Burn options icon, you can set a series of burning options like Burn Speed, Automatically eject the disc after burning, Burn CD without gaps etc.


Leave a Reply